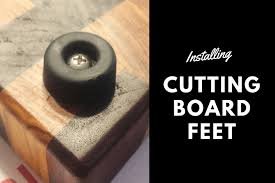
Installing Cutting Board Feet
don’t personally prefer installing cutting board feet on my wood cutting boards. I’m not really sure why exactly, maybe the more streamlined look or the ability to have a two-sided board?
Anyways, I do on occasion get a request for adding cutting board feet to a custom ordered board. I have tried several different cutting board feet but have finally settled on these cutting board feet I found on eBay. Despite being durable and well built, they’re made in the USA!
These cutting board feet are soft rubber, NON-MARKING, include metal inserts, and accept a #10 size screw (I suggest STAINLESS).
To install these cutting board feet, I like to locate and drill my holes first, then install after oiling the board. You can also add a drop of epoxy in the hole before installing if you are worried about the screws backing out (I haven’t had any issues).
Step 1:
Locate the ideal hole location. I like to place the cutting board feet on the board in a sensible, visual appealing location and then measure. In this example I went with 1″ from each edge of the board.
Step 2:
Use a center punch to mark the foot hole location. One tap with the hammer will give you enough indentation to give the drill bit enough reference that it will not wonder and scratch your board or put the hole in the wrong location.
Step 3:
Drill the hole. I use a high-tech drill bit stop aka blue tape to give me a consistent depth that matches the screws that I’m using. Hold the drill 90 degrees, center the drill bit in your indentation, and drill away until you reach the magic blue tape/depth stop.
Step 4:
Install your feet. I always use a screwdriver and do this part by hand to avoid any stripping or marring of the screw head.
There you go, durable and non-marking rubber cutting board feet installed in the perfect location on your cutting board!
Check out the full article How to Build an End Grain Cutting Board


