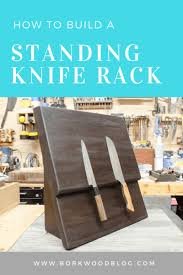
How to Build a Standing Knife Rack
This magnetic standing knife rack is a unique solution to knife storage that is both functional and appealing. The build process is fairly straight forward and possible using a variety of standard tools. For this demonstration I used American Black Walnut, but you could use almost any species or even mix species for an endless number of variations of this standing knife rack design.
A wall-hanging knife rack design can be found here: How to Build a Magnetic Knife Rack
You can view a video of the standing knife rack build below along with detailed plans of the project HERE.
This will be an abbreviated tutorial since a much more detailed set of plans are available for download.
Step 1: Milling the lumber
You can use a combination of 4/4 (1″) and/or 8/4 (2″) lumber for this project. The vast majority of these that I build are with Black Walnut by request, but any hardwood and even a mix of different hardwoods would be perfectly acceptable here.
Step 2: Gluing your panels
You want your combination of wood to make up two panels. The smaller panel will receive the magnets and then be glued to the larger panel to create one large panel with an indention where the knife handles rest when placed on the knife rack. Routing Cutting Board Handles
Step 3: Route or drill the magnet holes
Layout your magnet configuration (more details and measurements are included in the PLANS) on the back of the small panel and use a drill or router to get the holes as close as possible to the knife rack panel face.
Step 4: Glue the magnets and panels together
Place the magnets in the holes drilled previously it helps to have something metal like a baking sheet on the other side to hold them in place. You will then fill the holes with glue and spread glue over the panel to glue it to the larger panel, leaving the proper spacing for the knife handle area.
Step 5: Trim the panel and cut to shape
Here you want to square the sides up and cut your angles at both the top and bottom of the panel so it will sit flush on the counter top and look visually appealing. Nothing magical here, just a beveled cut on both ends.
Step 6: Route the edge and sand
The only edge I route is on the bottom of the small panel. This gives a little more wiggle room for longer knife handles when being placed and removed from the standing knife rack. You then want to sand the entire rack up to at least 150 grit and ease all of the edges and corners so they are not sharp.
Step 7: Make the standing knife rack base
Using a combination of 4/4 (1″) wood for the side pieces and 8/4 (2″) wood for the middle piece, you want to cut at the same angles as your panel bevels and glue them together.
Step 8: Attach the base to the panel
This can be done using many different methods. You can screw, biscuit, dowel, or domino the base to the panel using a combined of glue and a mechanical fastener for structural support. Be sure the base is centered on the panel and flush with the bottom.
Step 9: Branding, Sanding, and Finishing
Apply your brand at this point if you have one, I prefer to place it on the back of the panel. Then do a finish sanding making sure you knock down all edges and corners. Next you will apply whichever food-safe finish you prefer. I finish these just like I do my cutting boards with a few coats of mineral oil followed by a wax for protection.
Don’t forget to check out some of the Tools from my Shop as well as other Woodworking Projects.
If you are interested in building this magnetic standing knife rack.

