5 Garden Projects with Railway Sleepers
Railway sleepers aren’t just for train tracks anymore. These chunky wooden beams have become a go-to material for all sorts of garden projects. They’re strong, durable, and full of rustic charm. Reclaimed sleepers, for example, add a weathered, rustic look that feels right at home outdoors. They’re tough, versatile, and perfect for creating everything from raised beds to garden paths. Here are even more great ways to use railway sleepers outdoors.
1. Raised Garden Beds
Raised beds are one of the most popular uses for railway sleepers. And for good reason. They make planting and weeding easier. They also help keep the soil well-drained and tidy.
To build one, simply stack sleepers on top of each other in a rectangle or square. Secure the corners with screws or brackets. Add a layer of gravel at the bottom for drainage, then fill with soil. You can plant flowers, herbs, or even vegetables. It’s an easy weekend project with big results.

2. Garden Edging
If your flowerbeds or lawn needs a little structure, sleepers can help. Cut them to size and lay them lengthways along borders to create neat, defined edges. This helps keep grass and soil in place. It also adds a smart, finished look to any garden.
Some people choose to sink them slightly into the ground for a flush look. Others prefer to leave them raised for a bold border. Either way, edging with sleepers adds visual impact with very little effort.
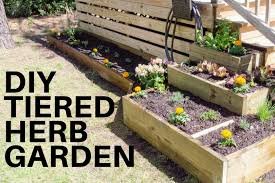
Read also: DIY Tiered Herb Garden
3. Steps and Garden Paths
Do you have a sloped garden? Sleepers make excellent steps. They’re solid, non-slip, and easy to shape into natural-looking stairs. You can set them into the ground, fill the gaps with gravel or soil, and they’ll stay put.
For paths, lay the sleepers flat like paving stones. Leave gaps between each one and fill them with gravel or ground cover plants. This breaks up the hard edges and helps the path blend into your garden.
4. Retaining Walls
Sleepers are perfect for small retaining walls, especially in sloped or terraced gardens. Because they’re so solid, they can hold back soil without shifting or bowing. Use them to create leveled planting areas or to section off parts of your garden.
You can stack them horizontally and secure them with metal rods or heavy-duty fixings. Or you can stand them vertically for a more dramatic effect. Either way, a sleeper wall adds structure and texture to your outdoor space.
5. Benches and Furniture
Want to add seating to your garden? Sleepers can do that, too. Their size and shape make them ideal for simple, sturdy benches. Stack two or three on top of each other for the base, and place one flat sleeper across the top for the seat.
You can also build tables, stools, or even a rustic bar. Sand them down for a smooth finish, or leave them rough for a more natural look. Add cushions or paint if you want a pop of color. The best part? They’ll last for years.
Final Thoughts
Railway sleepers bring a strong, timeless style to gardens of all shapes and sizes. They’re easy to work with, even for beginners. And they suit everything from modern designs to country gardens. Before starting your project, make sure the sleepers are treated for outdoor use. Whichever project you choose, one thing’s certain: railway sleepers can help transform your garden into a space that’s practical, beautiful, and built to last.